Arduino Only Read When Serial Monitor Input
There are multiple ways through which we can give inputs to the Arduino program. Similarly, these inputs can as well be displayed using different methods. The inputs can be given by interfacing some external devices like keypads or any sensor whose value can be manually inverse or by using the serial monitor of Arduino IDE.
Moreover, the inputs can be displayed using the series monitor likewise as interfacing the display modules with Arduino. This discourse explains giving input to the Arduino program using the serial monitor then displaying that input on the liquid crystal display (LCD) briefly.
Serial monitor of Arduino IDE
Arduino IDE is the software that bridges the communication between the computer and the Arduino boards using a USB cable. This software is mainly used to upload the Arduino program into the Arduino lath. Moreover, this software has a serial monitor which displays the outputs and inputs of the Arduino plan when it is compiled.
you tin open up the serial monitor past clicking on the blue icon on the top right on the Arduino IDE. After clicking a tab named serial monitor will be opened at the bottom of the ArduinoIDE.
To enter the input on the series monitor you can enter the input by writing information technology in the grayness bar that is highlighted in ruddy in the figure given beneath
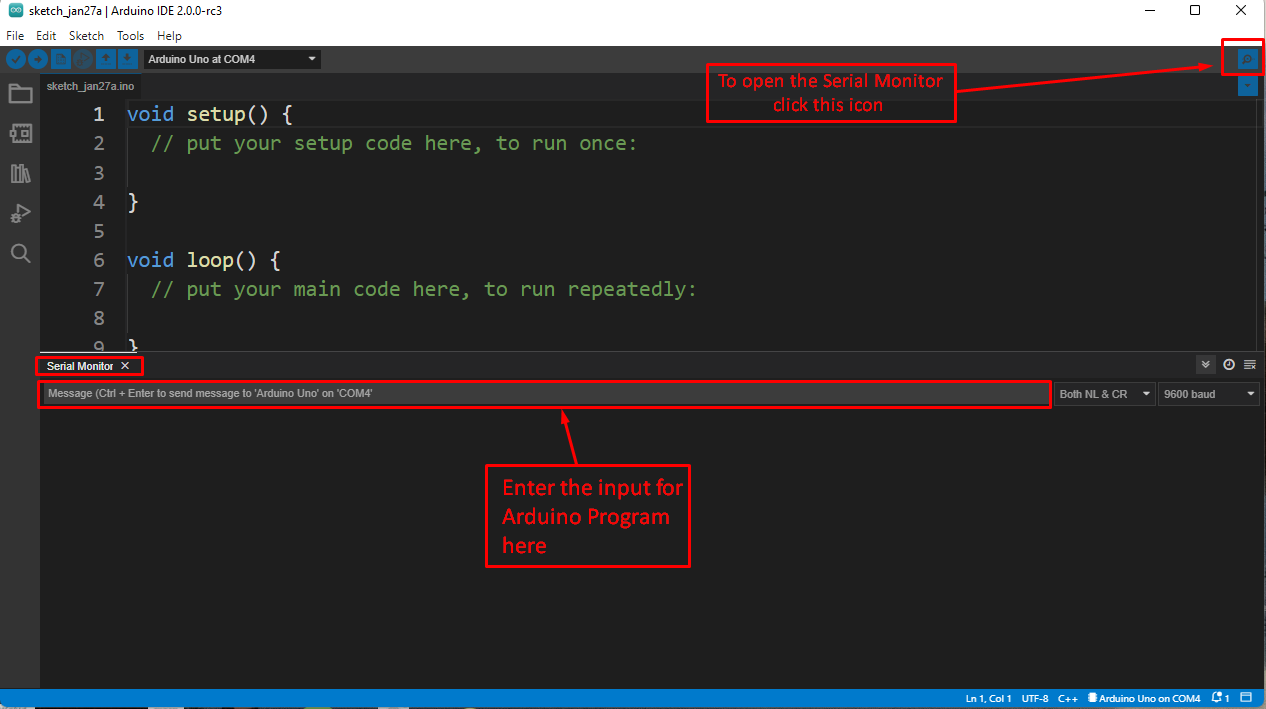
The figure higher up shows how the serial monitor can exist used in the Arduino IDE.
How to display series input from calculator to LCD
To give a articulate idea of how we can requite the input to Arduino using the serial monitor nosotros have given an case. The components used in this instance are:
- Arduino Uno
- Jumper wires
- Liquid crystal brandish
- Arduino IDE
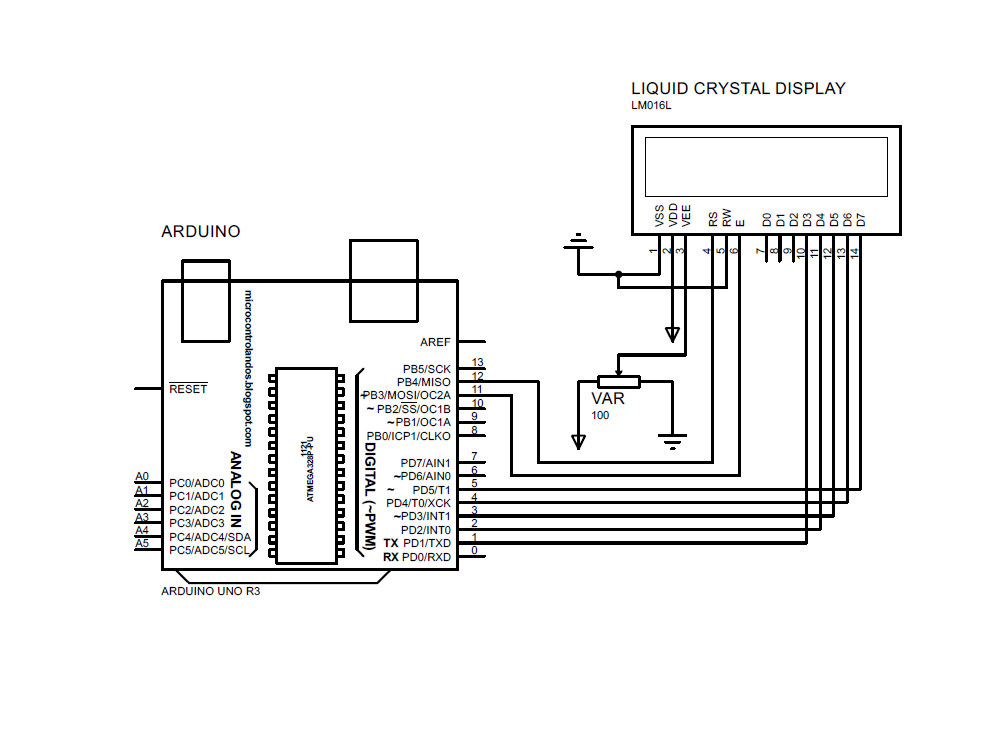
The schematic for the circuit is:
Hardware Assembly
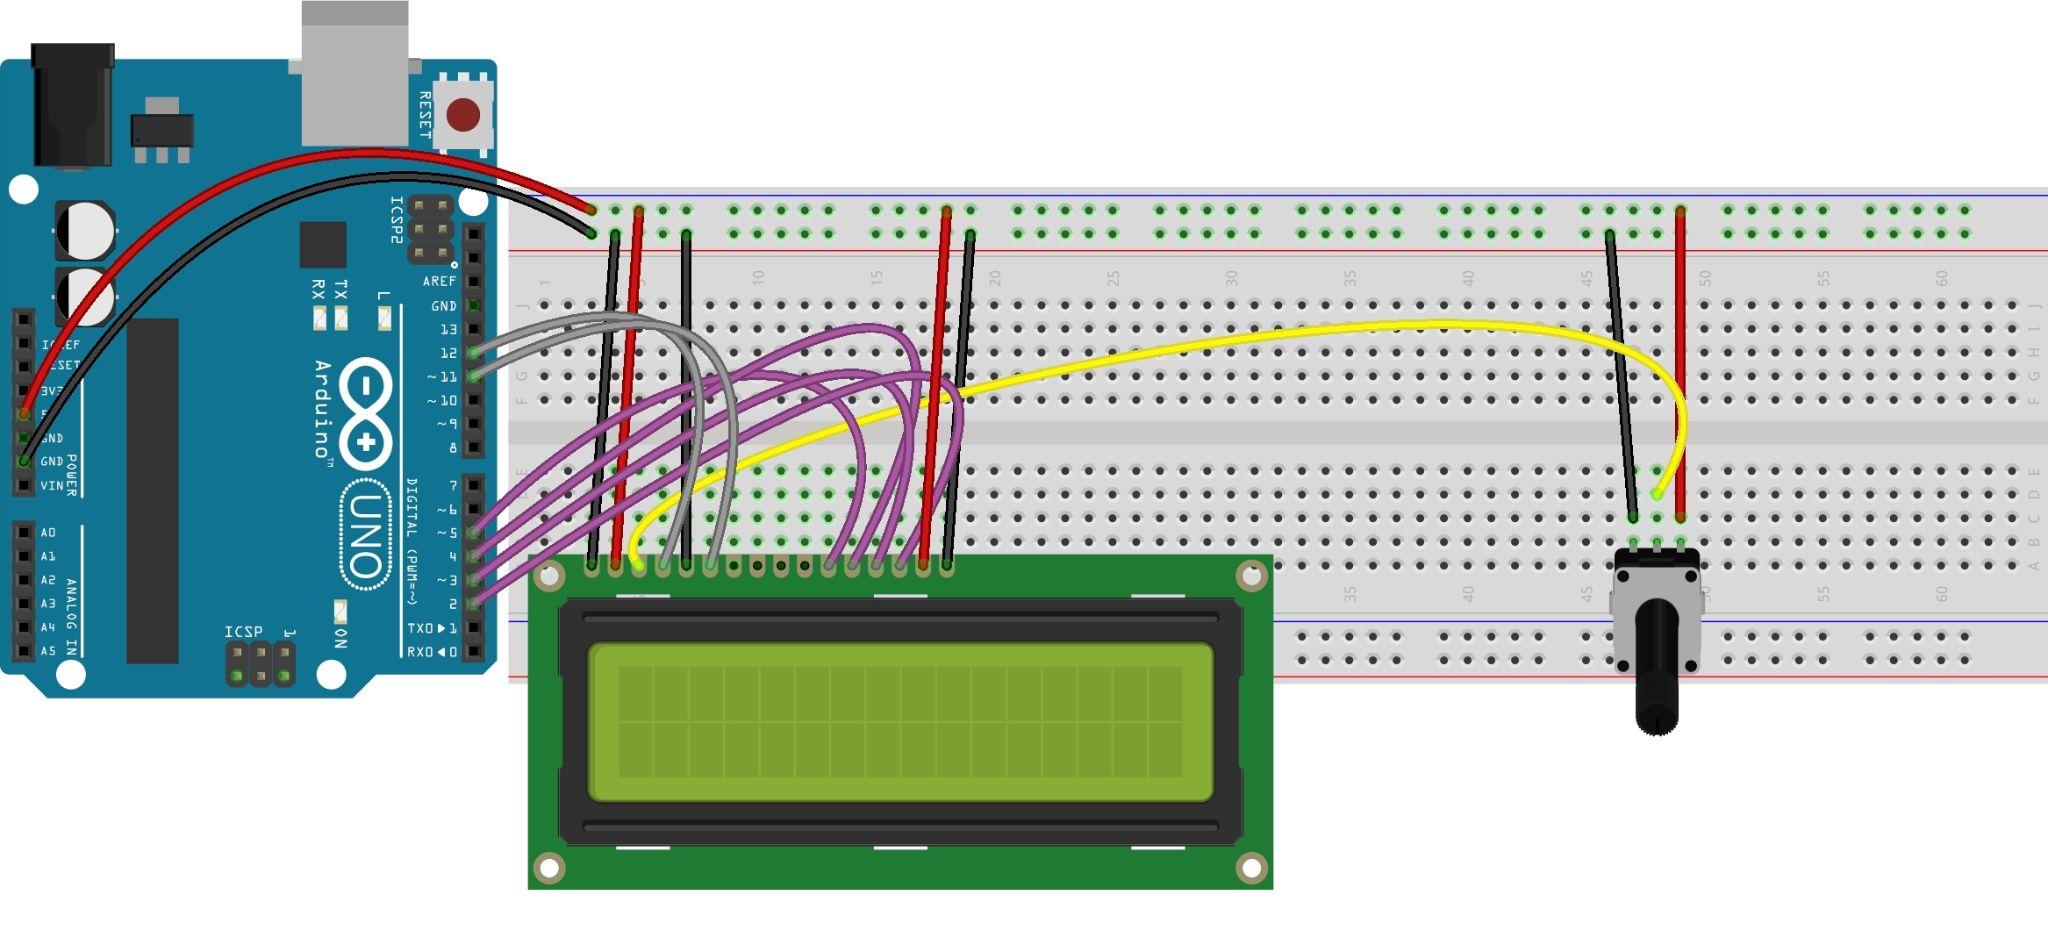
To connect the circuit we take positioned all the components on the breadboard first and afterward that using connecting wires we interface the LCD with Arduino.
Nosotros have given the image for the hardware assembly of the projection in which the imperial wires are connecting the data pins of the LCD with Arduino. Whereas the yellow wire connected to the output of the potentiometer is given to the liquid crystal brandish for its effulgence control. Furthermore, the gray pins are connecting the RS and Eastward pins of the LCD to the Arduino Uno.
Nosotros take used the top two pivot layers of the breadboard , one for the 5 volts and the other for the ground, to connect the LCD and potentiometer with voltage supply.
Arduino lawmaking for displaying the serial input on LCD
The Arduino code compiled for displaying the series input on the LCD is given as:
#include <LiquidCrystal.h>// library for LCD
LiquidCrystallcd( 12 , 11 , 5 , 4 , 3 , ii ) ; // Arduino pin for the LCD
void setup( ) {
Serial.begin ( 9600 ) ; // initializing the Serial communication
lcd.brainstorm ( 16 , two ) ; // initializing the dimensions of LCD
Serial.println ( "Enter a website" ) ; // information to be printed
lcd.setCursor ( 0 , 0 ) ; // setting the identify for the data on LCD
lcd.print ( "Enter a website" ) ; // data to be printed
}
char a_byte = 0 ; // defining a character data for a variable
String a_str = "" ; // creating a string having space
void loop( ) {
if (Series.available ( ) > 0 ) { /*checking if whatsoever input is given on the Serial monitor*/
a_byte = Series.read ( ) ; /*read if there is any input and save it in the grapheme information blazon variable*/
if (a_byte != '\n' ) { /*to display the information on the next line one line space is added to the string */
a_str += a_byte;
}
else {
Serial.println (a_str) ; // print the string on the serial monitor
lcd.setCursor ( 0 , 1 ) ; // setting the place for the data
lcd.print (a_str) ; // impress the data on the LCD
a_str = "" ;
Series.println ( "" ) ; // press the cord having space
}
}
}
The Arduino plan takes a grapheme input from the series monitor and then this input is displayed on the LCD interfaced with Arduino. We take used the Serial.available() role to read the inputs from the serial monitor which only reads the number of bytes that are bachelor for reading.
Subsequently the program finds that there is data available the Serial.read() function is used in the Arduino code for reading the data stored in the number of bytes. This is the bodily information, or nosotros can say the input given from the user on the serial monitor.
The information read by the Arduino is so given to the lcd.print() function so that it can brandish the data on the LCD. Furthermore, at that place are two if weather that are used: the beginning condition is used to check if in that location is any data on the bytes to read. The second condition sets the display position of the data that is given as an input in such a way that if the data is not coming on the first row of the brandish module then add together a space of the adjacent line in the string variable to move it to the next line. If not and so just display the data on the LCD.
Hardware output of the Arduino code for displaying serial input on LCD
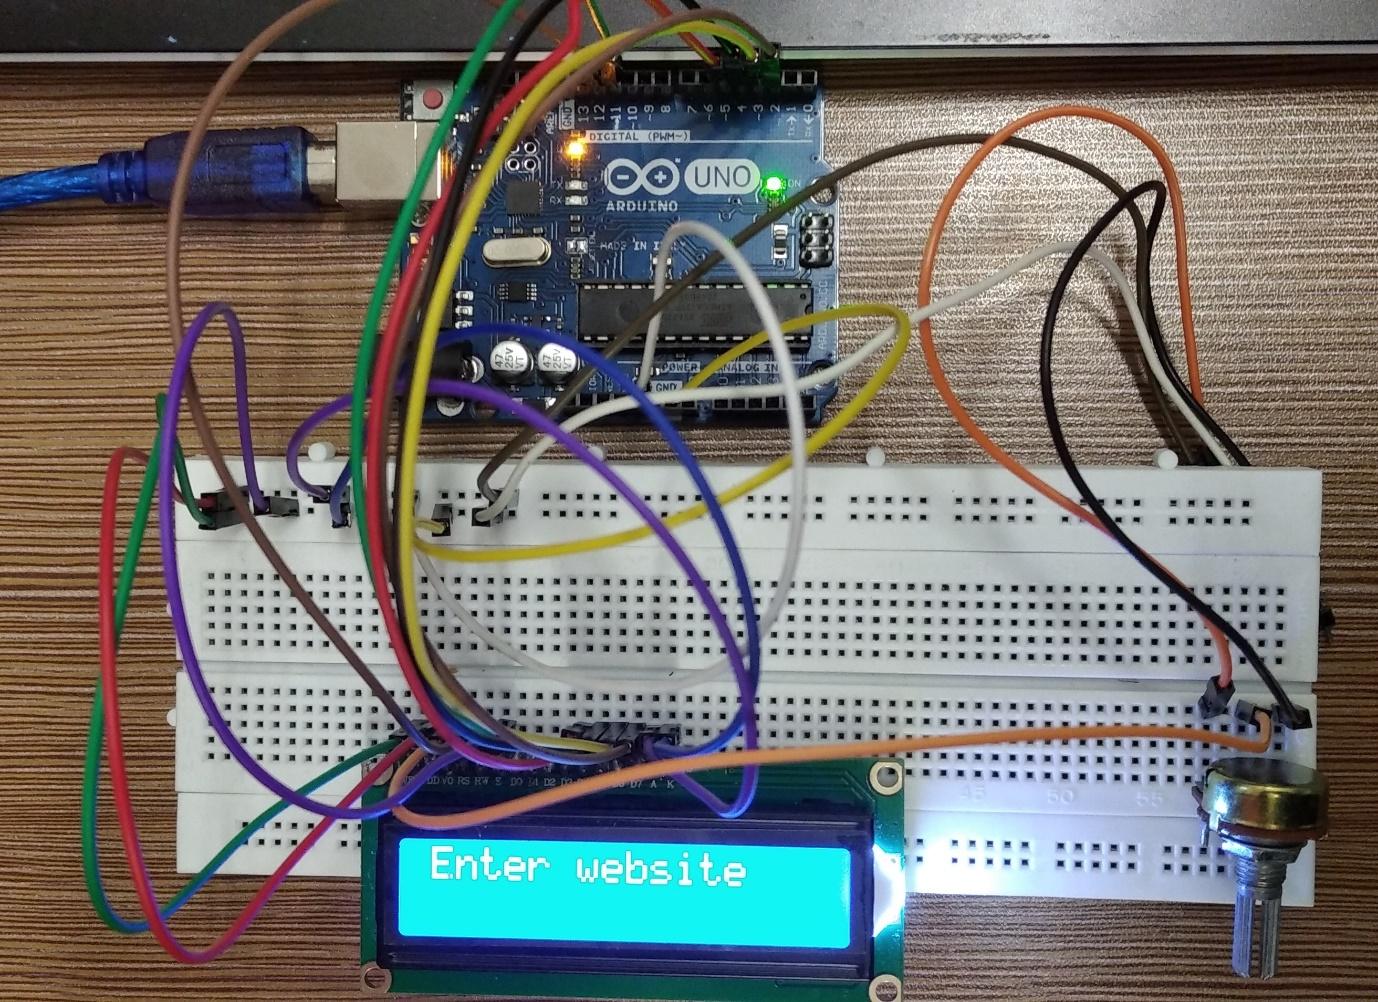
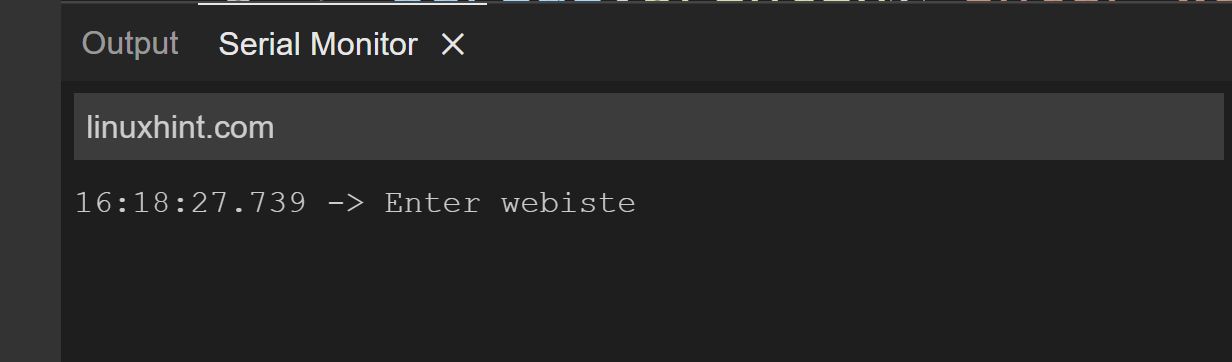
The Arduino code is asking to enter the proper name of any website in the serial monitor as shown in the figure below:
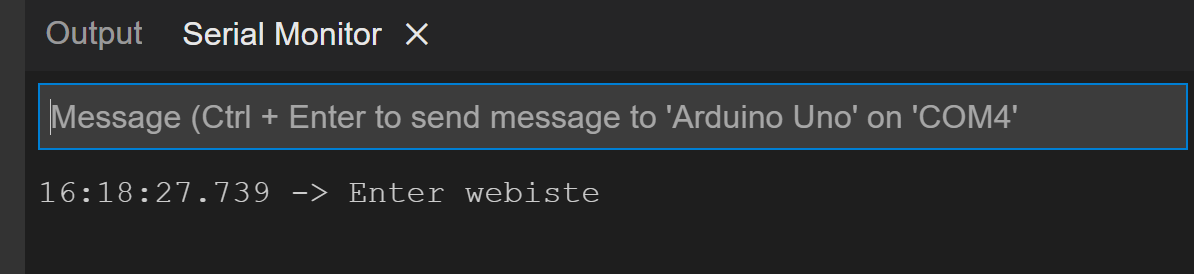
The same is likewise displayed on the LCD:
At present we take given the input to Arduino in the series monitor as written the gray colour row:
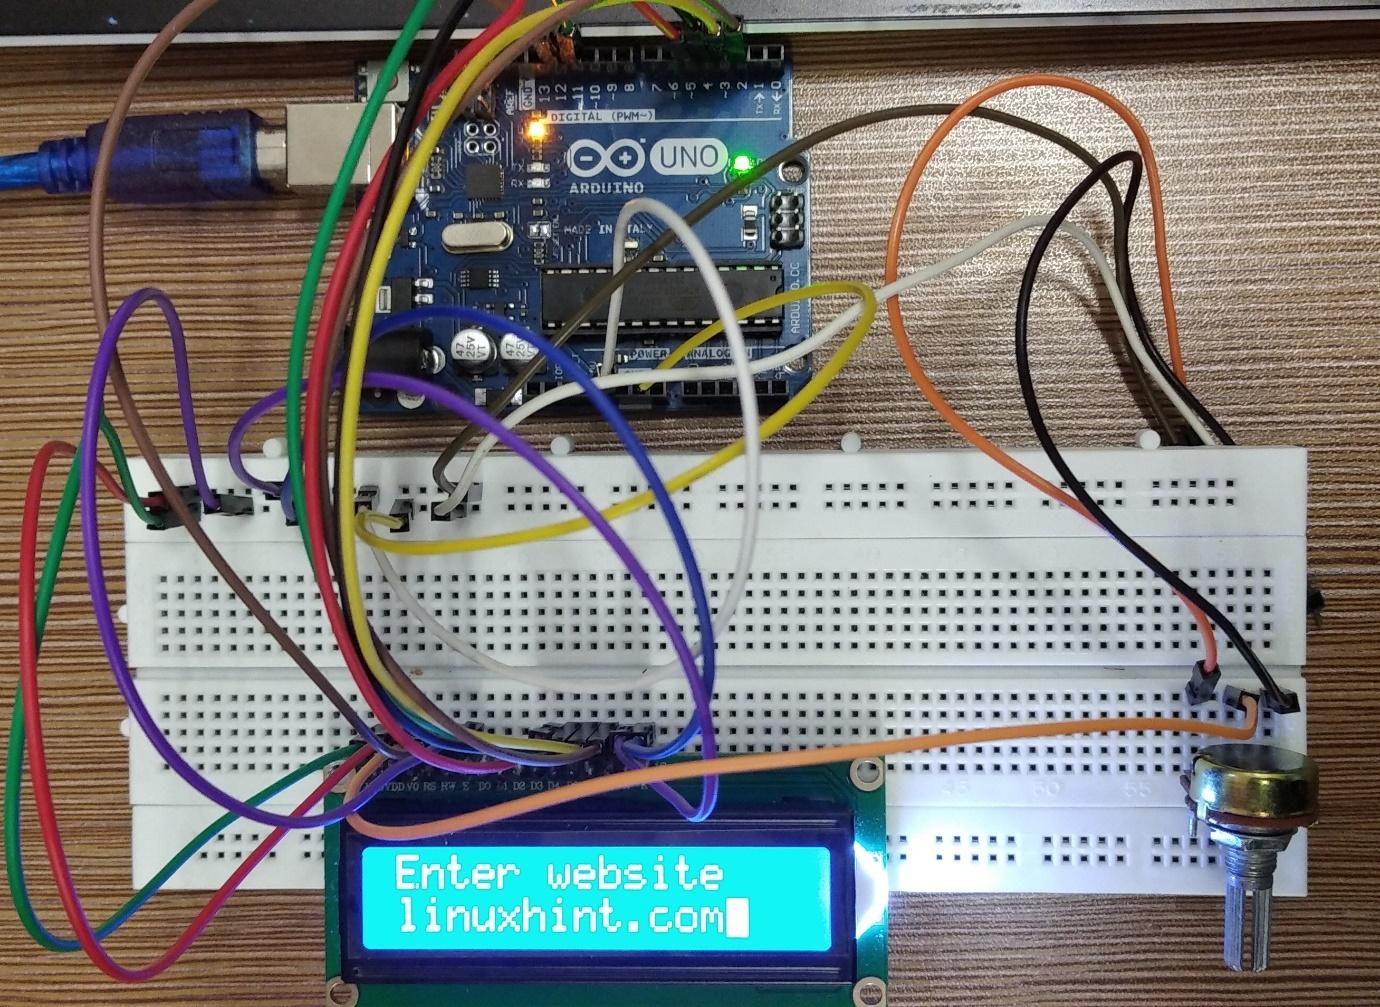
Then by pressing Ctrl+Enter to enter the input and the input will exist displayed on the LCD.
The input is displayed on the LCD when it is entered from the serial monitor and can be seen in the image posted below:
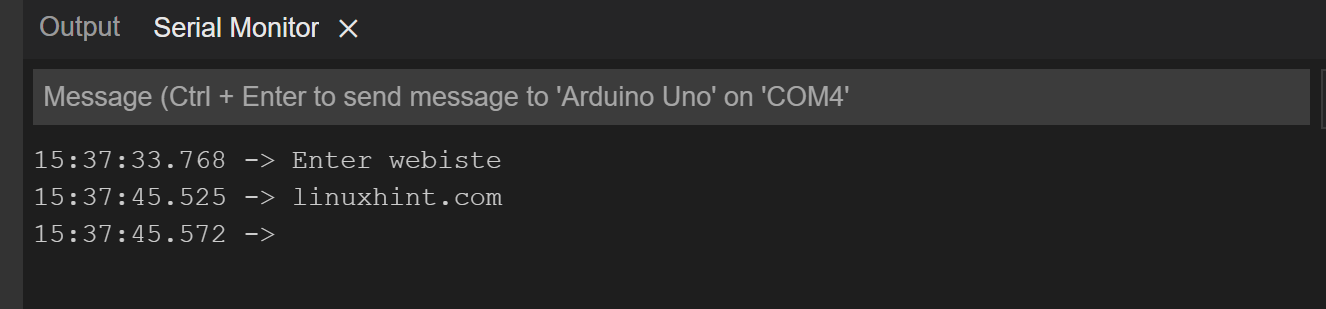
The input is too displayed on the serial monitor too:
Conclusion
In the Arduino programming we tin give the inputs to the Arduino lath using the Arduino IDE. The Arduino IDE uses its series monitor for displaying the outputs of the Arduino and also uses it for giving the inputs to the Arduino board. To give inputs using the serial monitor at that place are mainly ii functions used that are Serial.bachelor() and Serial.read() function. In this write-upward the series inputs are taken and and then displayed on the liquid crystal display (LCD).
About the author
![]()
I am an electrical engineer and a technical blogger. My slap-up involvement in embedded systems has led me to write and share my noesis most them.
Source: https://linuxhint.com/display-serial-input-computer-to-lcd-arduino/
0 Response to "Arduino Only Read When Serial Monitor Input"
Post a Comment